7 Ways to Prevent Deck Boards From Warping and Cracking in Summer Heat
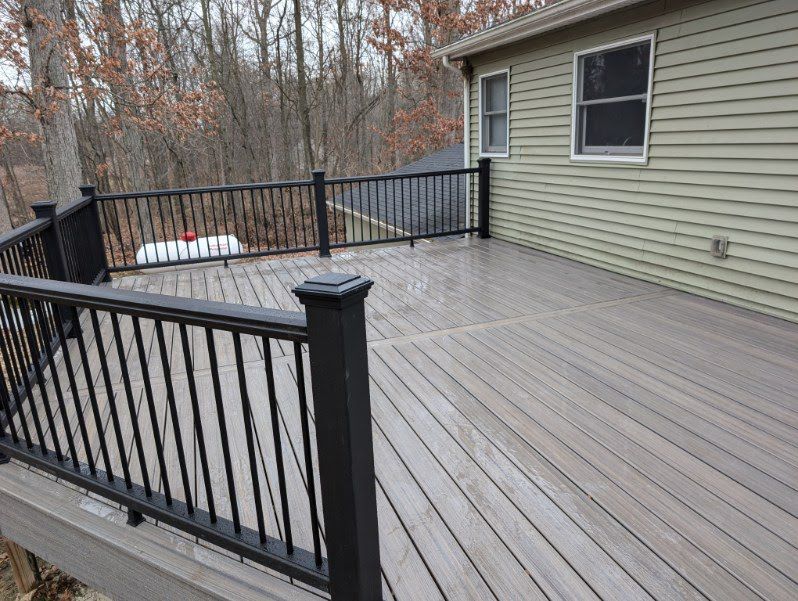
Hot weather is great for lemonade and late sunsets, but your wooden deck in Michigan? It’s crying inside. Summer is the season of backyard barbecues, evening get-togethers, and morning coffees on your deck. But while you’re soaking up the sun, your wooden deck might be suffering in silence, expanding, contracting, and developing structural issues under the intense Michigan summer heat and humidity. And once the damage begins, it’s often expensive and sometimes irreversible. You’re not alone if you’re tired of seeing your outdoor living space fade, split, or twist every time the temperature spikes across the Great Lakes region. The good news? With the right materials, maintenance schedule, and clever design decisions appropriate for Michigan’s unique climate, you can prevent warping and cracking and keep your deck looking brand new through all four of our distinct seasons. Let’s walk through exactly why decks warp in Michigan’s challenging environment, and how you can ensure your outdoor investment remains beautiful year after year. The Silent Summer Killer: Why Wooden Decks Suffer in Michigan Heat Your deck doesn’t melt; it warps, cracks, and deteriorates whenever the temperature fluctuates drastically, which happens frequently in our state. As charming as it is, wood reacts to Michigan’s summer like a drama queen. It expands when humid (which happens often near our Great Lakes), shrinks when dry, and struggles with prolonged sun exposure without serious protection. This cycle of swelling and shrinking causes boards to twist, pop, or split, especially with inadequately sealed or softer wood varieties. Heat gradually pulls moisture from the wood, leading to warping and cracking. Michigan’s sudden summer thunderstorms can further stress an already vulnerable deck, potentially causing structural damage. Our state’s unique combination of high humidity and intense summer sun creates particularly challenging conditions for wooden outdoor structures. At Michigan Rose Construction, we see this all the time across Michigan State Homeowners install gorgeous decks and forget that outdoor wood needs special attention in our climate, particularly when it soaks up UV rays all summer and endures freeze-thaw cycles all winter. Understanding why this happens is step one. Fixing it before it starts? That’s what the following sections are for. Ready to explore how these favorable conditions could benefit your outdoor project? Click Here 7 Ways to Prevent Deck Boards Warping and Cracking During Michigan Summers Let’s dive into practical ways to protect your wooden deck during the hot and humid days common throughout Michigan. 1.) Choose Wisely: Not All Wood Is Built to Handle Michigan’s Heat and Humidity Some woods thrive in our state’s variable climate, while others deteriorate quickly after the first summer season. This section is especially important if you’re just starting your deck journey or planning to rebuild. The type of wood you select is one of the most critical decisions for long-term durability in Michigan’s demanding environment. Hardwoods like ipe and teak are naturally dense and resistant to warping, performing exceptionally well even near lakefront properties. Cedar and Michigan-grown white oak are more affordable options with natural oils that resist moisture, helping to prevent wood splitting during our extreme temperature fluctuations. Pressure-treated lumber is another popular choice for Michigan decks due to its affordability and chemical treatments that enhance durability. Composite decking, while not traditional wood, offers outstanding resistance to our state’s weather challenges and requires minimal maintenance. Conversely, untreated pine and other softwoods are more likely to crack under Michigan’s seasonal pressure. They’re cheaper upfront, but those savings disappear fast when repairs become necessary after just one or two seasons. Choosing the right material for your deck isn’t about guessing. It’s about knowing what will withstand Michigan’s unique combination of summer humidity, intense sun, and winter freeze-thaw cycles. 2.) The Magic of Sealing: Your Deck’s Invisible Michigan Summer Armor A suitable sealant is like SPF 50 for your deck – absolutely essential in our sun-intense summers. If your deck isn’t properly sealed, it’s vulnerable to every Lake Michigan rainstorm, every humid heatwave, and every temperature fluctuation. Quality sealants help by locking out moisture and blocking damaging UV rays that dry out the wood. They create the critical barrier needed to keep boards from breaking when Michigan weather changes abruptly, as it often does. Most sealants last one to three years in our climate, depending on exposure, so make it a habit to inspect your deck every spring after the snow melts. If water doesn’t bead on the surface, it’s time for a new coat before summer arrives. Michigan Rose Construction offers professional sealing services specifically formulated for our state’s climate conditions that not only protect but also enhance the natural grain and tone of your wood. This upgrade makes your deck both beautiful and resilient against our unique seasonal challenges. 3.) Clean Like You Mean It: Michigan’s Climate Demands Regular Maintenance Summer fun brings friends, food, and potentially damaging organic matter to your deck surface. Letting leaves, pollen, dirt, or mildew accumulate on your deck invites rot and accelerates warping. In Michigan’s humid environment, debris traps moisture which seeps into the wood, compromising its structural integrity over time. Our state’s abundant tree coverage means more leaves and organic matter finding their way onto your outdoor living spaces. A monthly sweep and gentle wash with a deck-safe cleaner can significantly extend your deck’s lifespan. Remember to check between boards and underneath the structure – that’s where problems typically begin, especially in shaded areas common in Michigan’s wooded landscapes. A clean deck not only looks better but also lasts substantially longer. Plus, no one wants to step barefoot onto a moldy patch during your Ann Arbor or Traverse City summer gatherings. 4.) Prevent Deck Boards Warping with Smart Deck Design for Michigan’s Climate How you build your deck matters as much as what it’s made from, especially considering our state’s weather patterns. Why do some Michigan decks stay flat for years while others start deteriorating after one hot summer? The answer often lies in the design. Proper spacing between boards allows for natural expansion and contraction without
Best Concrete Patio Sealants to Prevent Sun Damage: Complete Guide
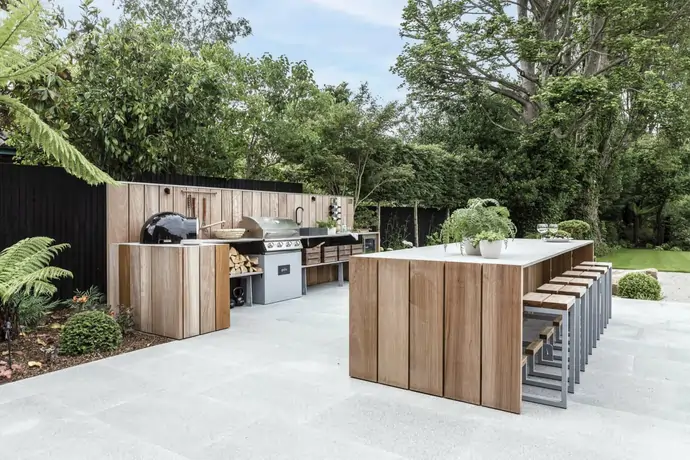
Is your concrete patio showing signs of wear from constant sun exposure? You’re not alone. While concrete is durable, it remains vulnerable to UV damage that can lead to fading, drying, and surface cracking over time. Fortunately, the right concrete patio sealant acts like sunscreen for your outdoor space, providing essential protection while enhancing your patio’s appearance. In this comprehensive guide, we’ll explore the best concrete sealants for UV protection and help you make an informed decision for your outdoor space. Why Concrete Patio Sealants Are Essential for Sun Protection Unprotected concrete gradually deteriorates when exposed to the elements. Even the sturdiest patios will suffer damage from the combined effects of intense sunlight, rain, and everyday dirt. High-quality concrete patio sealants offer benefits that go far beyond aesthetic improvements: UV Protection: Prevents fading and chalky residue formation caused by harsh sunlight. Water Resistance: Blocks liquid penetration that leads to mold growth and freeze-thaw damage. Crack Prevention: Reduces surface cracking and erosion for longer-lasting concrete. Enhanced Appearance: Improves color vibrancy and surface texture for a more elegant patio. Easier Maintenance: Makes cleaning simpler as contaminants remain on the surface instead of penetrating the concrete. Long-Term Value: Serves as a smart investment that keeps your patio maintenance-free and durable for years. Key Factors to Consider When Choosing a Concrete Patio Sealant With numerous options available, selecting the right concrete sealant can be overwhelming. Consider these crucial features when shopping for a concrete patio sealant: Ready to explore how these favorable conditions could benefit your outdoor project? Click Here 5 Best Concrete Patio Sealants for UV Protection After extensive research, we’ve identified the top concrete patio sealants that combine superior UV protection with durability and attractive finishes: 1. Foundation Armor AR350 Wet Look Sealer Best for: Glossy finish with maximum UV defense This solvent-based acrylic sealer creates a rich, wet appearance while providing robust UV protection for your patio surfaces. Particularly effective for stamped and decorative concrete, this sealant offers a minimum lifespan of three years. Pros: Stylish high-gloss finish enhances concrete color Superior sun and water resistance Quick drying time for faster project completion Cons: Strong odor during application Requires adequate ventilation during use 2. Seal-Krete Clear-Seal Urethane Sealer Best for: Clear, low-gloss protective barrier This water-based sealer delivers reliable sun damage prevention along with oil and grease resistance. It performs equally well for both indoor and outdoor concrete surfaces. Pros: User-friendly application and cleanup Resists yellowing even with prolonged sun exposure Can be made slip-resistant with optional additives Cons: May require multiple coats for optimal protection Longer curing time than solvent-based alternatives 3. ToughCrete Concrete Sealer Best for: Long-lasting penetrating protection ToughCrete uses siloxane technology to provide deep-penetrating concrete protection that lasts 10+ years. This product delivers exceptional outdoor durability and is perfect for homeowners who prefer maintaining concrete’s natural appearance. Pros: Extremely long-lasting formula Invisible finish preserves concrete’s natural look Ideal for covering large patio areas efficiently Cons: No glossy finish option available Higher initial investment than some alternatives If minimizing future maintenance is your priority, this penetrating concrete sealer offers optimal long-term protection. 4. Ghostshield Lithi-Tek 9500 Best for: Eco-friendly protection with industrial strength This water-based concrete sealer serves as an environmentally conscious option that withstands severe weather and intense sunlight. It creates effective waterproofing and sun damage protection without altering the concrete’s natural appearance. Pros: Environmentally friendly formula Provides up to 10 years of concrete protection Rapid drying time minimizes project duration Cons: Only available in matte finish Requires thoroughly cleaned and completely dry concrete before application Want to enhance your deck with a custom pergola? Schedule a design consultation with our Michigan Deck and Pergola Specialists! Click Here 5. Eagle Supreme Seal Best for: Budget-friendly UV protection For reliable results at an affordable price point, Eagle’s solvent-based concrete sealer represents an excellent value. It offers an attractive satin finish with good UV protection at a reasonable cost. Pros: Budget-friendly pricing Excellent for enhancing decorative concrete Straightforward application process Cons: Stronger odor during application May require more frequent reapplication than premium options Why Every Outdoor Concrete Patio Needs a Quality Sealant Anyone considering skipping concrete sealer should reconsider. Leaving your patio unprotected will lead to expensive consequences: Continuous sun exposure permanently weakens concrete material Freeze-thaw cycles cause damage when moisture enters through existing cracks Unsealed concrete becomes difficult to clean, especially with oil spills and stubborn dirt Color fading and spotty discoloration develop over time By applying a top-rated concrete patio sealant, you prevent these issues while achieving a professional finish. Your sealed patio will require less maintenance, last longer, and save you money on future repairs. Even DIY beginners can successfully apply concrete sealants. No specialized tools or professional contractors are needed – just a broom, paint roller or sprayer, and a dry weekend to complete the project. How to Apply Concrete Patio Sealant: DIY Tips for Professional Results Want professional-looking results? Follow these simple steps: Step 1: Thoroughly Clean the Surface Use a pressure washer along with stiff-bristled brooms and a concrete cleaner to remove all dirt, oil residues, and mildew. Allow the patio to dry completely before proceeding. Step 2: Check the Weather Forecast Plan for at least 48 hours of dry weather before starting application. Concrete sealants require dry conditions to properly cure. Step 3: Apply the Sealant Evenly Use a roller or sprayer to apply a thin, uniform coat of sealer. Avoid creating puddles or over-applying. For optimal results, apply two thin coats following the manufacturer’s specific instructions. Step 4: Allow Sufficient Curing Time Let the sealant dry completely before walking on the surface or placing furniture on your patio – typically 24-48 hours depending on the product. Also Planning a basement remodel? Start with a solid foundation inspection Don’t let limited space limit your dreams. At Michigan Rose Construction, we specialize in turning basements into stunning, functional retreats that feel twice their size. Our expert team knows every inch counts, and we’re masters at maximizing small spaces with smart design solutions
How to Protect Your Deck from Michigan Summers: Pergola Installation & More
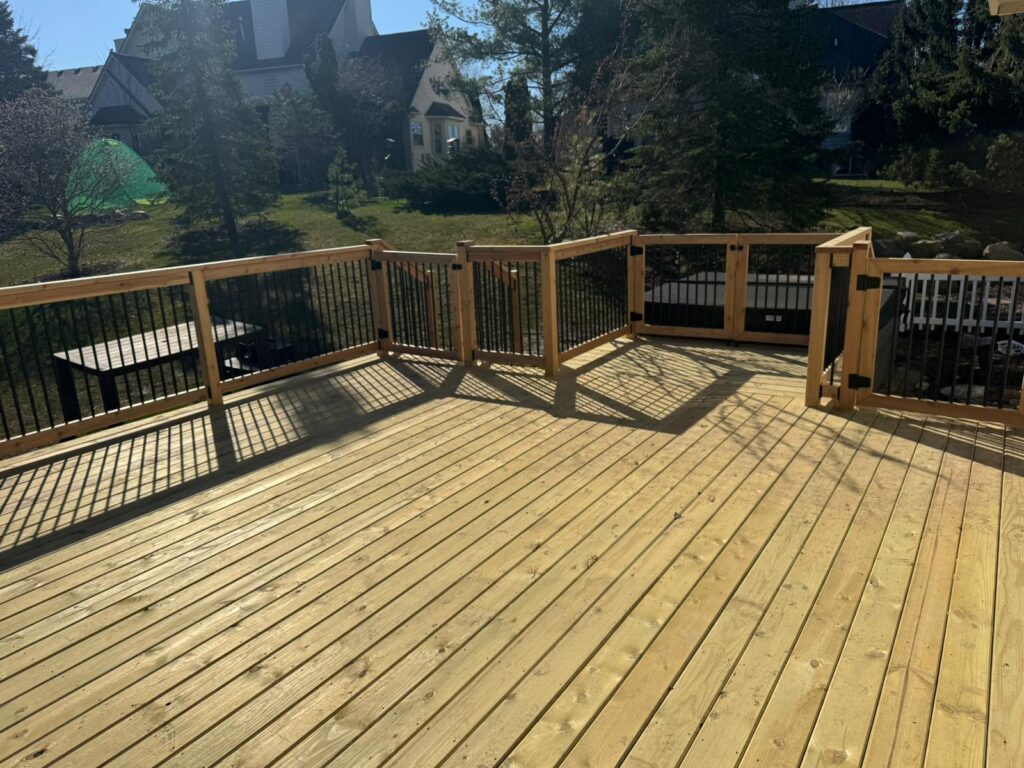
With summer just around the corner, now’s the perfect time to start protecting your deck from Michigan’s heat and humidity. Properly protecting your deck during Michigan summer months ensures both comfort and longevity of your outdoor space. The high humidity and hot weather conditions in our region can lead to deck deterioration through fading, warping, and heat damage. Every deck presents different design needs, which must be analyzed to determine sunlight coverage patterns. If you want to build a heat-resistant deck, you need proper material selection combined with effective shading solutions and appropriate maintenance practices. Here are 10 reliable methods to protect your deck from Michigan summers: 1. Install a Pergola for Ultimate Deck Protection Hot, humid Michigan summers call for innovative cooling solutions, and installing a pergola is one of the most effective ways to enhance your deck. A pergola creates shade while maintaining an attractive appearance. This structure significantly reduces sunlight exposure, making your outdoor area more comfortable throughout the summer months. Consider these excellent pergola options for your Michigan deck: Traditional Wood Pergola Provides an elegant, timeless appearance for outdoor spaces Can be modified in shape, size, and color to match your existing deck design Requires regular maintenance with sealing or staining to protect from rot and weather exposure Modern Metal Pergola Offers stylish contemporary aesthetics perfect for modern outdoor spaces Requires minimal care—simply clean periodically to maintain appearance Constructed from aluminum or steel for exceptional durability against Michigan’s challenging weather Ready to explore how these favorable conditions could benefit your outdoor project? Click Here Rustic Cedar Pergola Environmentally friendly and sustainable building material Natural resistance to decay, insects, and rot—perfect for Michigan’s climate Creates a warm, inviting atmosphere for your outdoor living space Vinyl Pergola Excellent long-term durability with resistance to extreme weather and moisture Low maintenance—only requires occasional cleaning with soap and water More affordable than wooden and metal counterparts with numerous style options 2. Use Outdoor Umbrellas for Flexible Shade Outdoor umbrellas, alongside a dining table and BBQ grill, provide effective deck protection from Michigan’s intense summer sun. These flexible shading solutions are lightweight and adjustable, allowing you to position shade exactly where needed throughout the day. Plus, they offer affordable cooling solutions for your deck. Consider these options: Cantilever Umbrellas: Supply shading through pole-free design, leaving open ground beneath Double-Sided Umbrellas: Ideal for larger deck areas, ensuring better coverage UV Protection Umbrellas: Fabric with built-in sun-blocking properties for both UV protection and temperature reduction Portable and Adjustable Options: Easily position shade where needed as the sun moves throughout the day 3. Integrate Shade Sails for Stylish Protection Shade sails serve as fashionable elements that successfully block solar rays while enhancing your deck’s appearance. These flexible fabric structures adapt to various configurations for any deck design. Here’s how to effectively use shade sails to protect your Michigan deck: Color Selection: Choose pale-toned shades to reflect sunlight and create a cooler deck area Strategic Layering: Install various shade sails at different angles for maximum coverage with added visual depth Easy Installation: Attach to existing framework elements for simple setup Customization Options: Personalize according to your deck’s spatial needs with different geometric shapes Weather-Resistant Materials: Durable fabrics withstand Michigan’s varied weather conditions while offering strong sun protection 4. Add a Misting System for Active Cooling Keep summer heat off your deck by installing an outdoor misting system custom-built for your Michigan property. Misting systems help decrease deck surface temperature by producing fine water droplet spray that cools air through evaporation. While not as common as other solutions, a misting system offers strategic benefits: Portable Misters: Consider portable misting fans for flexible cooling throughout your deck area Energy Efficiency: These systems require minimal water and electrical power, making them eco-friendly Programmable Timers: Connect with timers to schedule activation and set mist duration for better water conservation Want to enhance your deck with a custom pergola? Schedule a design consultation with our Michigan Deck and Pergola Specialists! Click Here 5. Choose Cool Decking Materials Selecting suitable decking materials is crucial for temperature regulation. Natural heat-resistant materials provide better comfort during Michigan’s summer days outdoors. Consider composite decking with cooling technology, bamboo, or treated wood to establish a comfortable outside area. Proper deck maintenance is essential to ensure its condition and ability to serve as a refreshing outdoor space. 6. Plant Shade Trees for Natural Protection A strategic summer heat reduction approach focuses on placing trees above outdoor living areas. A deck under natural tree shade creates a comfortable environment that everyone will appreciate. Trees around your deck generate a lovely shaded setting where you can enjoy gentle breezes while filtered light passes through the leaf coverage. For optimal results: Plant trees in positions that deliver sufficient shade while maintaining views and accessibility Select fast-growing species to establish shade quickly Choose deciduous trees that create summer shade but allow winter sunlight Position toward southern and western exposures to protect against harsh afternoon sun 7. Install a Roof or Awning for Complete Coverage Permanent shade and protection come with roof or awning installations. This cooling solution reduces deck temperature and enables multi-weather usage of your outdoor space. Michigan homeowners can install either a permanent roof or an adjustable awning based on their sun protection requirements: Insulated Roofs: Decrease sun-generated heat transfer through insulating properties Fixed Roofs: Provide complete protection with designs that enhance your home’s architecture Glass or Polycarbonate Roofs: Enable modern patio designs with built-in UV protection Retractable Awnings: Expand or contract to fit various needs with convenient mechanisms Also Planning a basement remodel? Start with a solid foundation inspection Don’t let limited space limit your dreams. At Michigan Rose Construction, we specialize in turning basements into stunning, functional retreats that feel twice their size. Our expert team knows every inch counts, and we’re masters at maximizing small spaces with smart design solutions that work perfectly for Michigan homes. Request free consultationLearn More About Basement Remodel for Limited Space Our Michigan-Focused Expertise 15+ years of specialized experience with
Basement Remodeling vs. Finishing: The Complete Guide for Michigan Homeowners
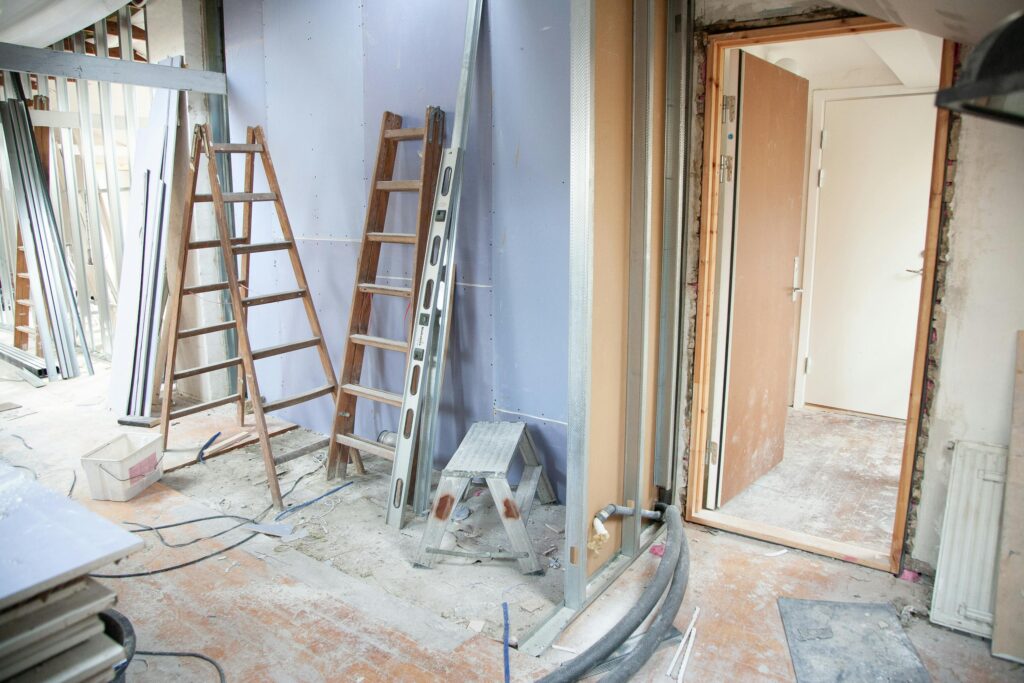
Unlock Your Home’s Hidden Potential Michigan homes typically feature 800-1,200 square feet of basement space that often goes underutilized. Whether your basement currently serves as reluctant storage, an occasional laundry visit, or has been partially improved over the years, it represents one of your home’s most valuable opportunities to expand living space and increase property value. But should you finish your basement or completely remodel it? These terms are often used interchangeably, yet they represent significantly different approaches with distinct implications for your budget, timeline, and results. Understanding these differences is crucial for making informed decisions about your Michigan basement project. Finishing vs. Remodeling: Understanding the Critical Differences What is Basement Finishing? Basement finishing transforms an unfinished space (with exposed foundation walls, open ceiling joists, concrete floors, and visible utilities) into habitable living areas without making significant structural or mechanical changes. A typical finishing project includes: Framing walls against existing foundation Installing insulation and drywall Adding electrical outlets and lighting Installing flooring over concrete Adding basic trim and paint Enclosing some mechanical systems and ductwork Creating a finished ceiling (drop ceiling or drywall) Finishing works within your basement’s existing configuration without moving structural elements, plumbing, or major mechanical systems. This approach makes sense when your basement is already structurally sound and the layout works for your intended purpose. What is Basement Remodeling? Basement remodeling involves more substantial changes to your space’s layout, structure, or systems. A remodeling project typically includes all finishing elements plus: Waterproofing or foundation repairs Moving or installing new plumbing lines Relocating mechanical systems (furnace, water heater, etc.) Adding or expanding windows and exterior access Removing or reconfiguring support columns Installing specialized electrical requirements Creating custom-built features like bars or entertainment centers Adding bathrooms or kitchenettes requiring new utility connections Installing egress windows for legal bedrooms Floor lowering to increase ceiling height Remodeling addresses fundamental issues and creates optimized spaces tailored specifically to your needs, often resulting in a more comprehensive transformation. Assessing Your Basement’s Starting Point Before deciding between finishing and remodeling, a thorough assessment of your Michigan basement’s current condition provides essential context for decision-making. Structural Evaluation Begin by evaluating your basement’s structure: Examine foundation walls for cracks, bowing, or water penetration Check for proper drainage around foundation perimeter Assess floor slabs for cracking, unevenness, or moisture Measure ceiling height (Michigan code requires minimum 7′ for habitable spaces) Identify load-bearing elements that cannot be moved Note support column placement and potential alternatives Ready to explore how these favorable conditions could benefit your basement project? Click Here Moisture Assessment Moisture assessment is particularly critical in Michigan basements: Look for efflorescence (white powdery deposits) on walls indicating water penetration Check for visible water stains or damage Test humidity levels in various weather conditions Inspect existing drains and sump systems Evaluate exterior grading and gutter systems Consider seasonal water table variations common in Michigan Get Your Free Michigan Basement Moisture Assessment Today! Before proceeding with your basement remodeling project, ensure your moisture issues are completely resolved. Contact Michrose Construction for a thorough moisture assessment and customized waterproofing plan designed specifically for your Michigan home’s unique conditions. Click Here Mechanical and Utility Evaluation Mechanical and utility evaluations should include: Location and condition of HVAC equipment Water heater placement and venting requirements Electrical panel capacity and location Main plumbing lines and potential connection points Gas line locations if applicable Ductwork and plumbing obstructions affecting ceiling height. Signs that remodeling might be necessary include: Active water intrusion requiring waterproofing systems Significant foundation issues needing repair Inadequate ceiling height requiring floor lowering Poorly placed mechanical systems disrupting optimal layout Insufficient electrical service for intended uses Lack of appropriate emergency egress for bedroom spaces When to Choose Basement Finishing Finishing might be the right approach when: Your basement has minimal moisture issues and sound structure The existing layout works for your intended purposes Mechanical systems are already properly positioned Ceiling height is adequate without modifications You’re seeking general-purpose living space Budget or timeline constraints favor a less intensive approach You’re planning to sell within 5 years A typical Michigan basement finishing project includes: Installation of moisture barriers appropriate for our climate Framing of perimeter walls and any room divisions Electrical improvements for code-compliant lighting and outlets Insulation meeting Michigan’s energy requirements (typically R-13 minimum for walls) Drywall or alternative wall coverings Ceiling solutions (suspended ceiling systems or drywall) Flooring appropriate for below-grade applications Trim, paint, and basic fixtures Stairway improvements for safety and aesthetics Basic heating extensions from existing systems These projects typically take 4-8 weeks from start to completion, assuming no significant delays in permitting or inspections. When to Choose Basement Remodeling Consider the remodeling approach when: Your basement has significant moisture or structural issues You want major layout changes or room reconfigurations Current ceiling height is inadequate You want dedicated bathroom or kitchen facilities Your vision includes specialized spaces like home theaters You plan to stay in your home long-term Energy efficiency is a priority Premium home value increase is desired Full basement remodeling projects typically include: Waterproofing and moisture remediation systems Foundation repairs or modifications if needed Layout reconfiguration for improved space utilization Plumbing installation or relocation Electrical system upgrades beyond basic code requirements HVAC modifications or dedicated systems Egress window installation or expansion Specialized room construction (bathrooms, kitchens, theaters) Custom built-in features and storage solutions Premium flooring, lighting, and finish selections Soundproofing between basement and upper floors Stairway reconstruction for improved access Timeline expectations run from 8-16 weeks, depending on scope and complexity. Cost Breakdown: Where Your Money Goes Understanding how your budget will be allocated helps with planning and prioritization: For Finishing Projects: Framing and insulation: 15-20% Electrical and lighting: 15-20% Drywall and ceiling: 15-20% Flooring: 15-25% Trim, paint, and doors: 10-15% Design and permits: 5-10% Miscellaneous: 5-10% For Remodeling Projects: Waterproofing and structural: 15-25% Framing and insulation: 10-15% Plumbing: 10-20% (if applicable) Electrical and lighting: 10-15% HVAC modifications: 5-15% Drywall and ceiling: 10-15% Flooring: 10-15% Trim, paint, and doors: 5-10% Specialized features: 10-20% Design and permits:
Converting Damp Michigan Basements: A Cozy Living Space Guide
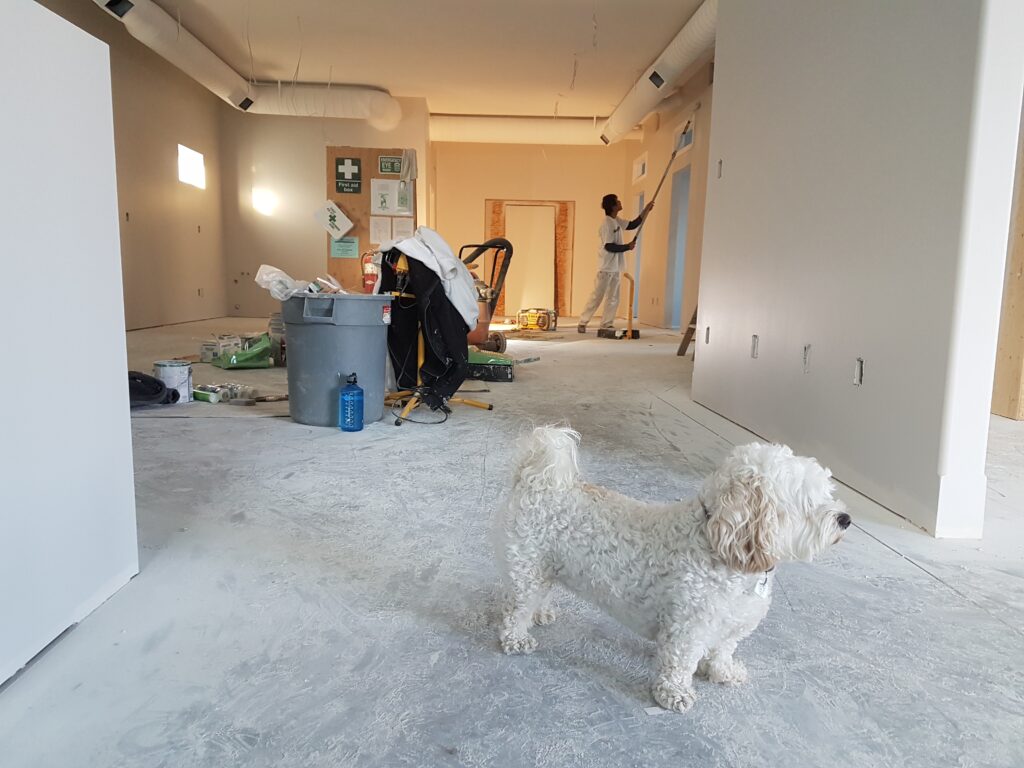
Converting Damp Michigan Basements: A Cozy Living Space Guide Michigan homeowners face a common challenge: damp, dark basements that serve as little more than reluctant storage areas or laundry rooms. Yet these underutilized spaces represent significant untapped potential—often 800-1,200 square feet of living space waiting to be reclaimed. With proper techniques and regional knowledge, even the most challenging Michigan basement can be transformed into a comfortable, inviting extension of your home. At Michrose Construction, we’ve helped hundreds of Michigan families reclaim their basement spaces through targeted solutions designed specifically for our unique regional challenges. This comprehensive guide walks you through the process of converting your problematic basement into one of your home’s most beloved living areas, with specific attention to Michigan’s moisture, temperature, and structural considerations. In Michigan’s ever-evolving home improvement landscape, basement remodeling has emerged as one of the smartest investments homeowners can make. Recent trends show that underground space renovations have steadily increased across Michigan in recent years, with homeowners recognizing both the immediate lifestyle benefits and long-term value these projects deliver. We’ve witnessed firsthand how a thoughtfully designed lower level transformation can revolutionize a home’s functionality and worth. What makes the current climate particularly favorable for upgrading your basement? A unique convergence of market conditions, material availability, and seasonal timing has created an optimal window of opportunity for Michigan homeowners. Assessing Your Michigan Basement’s Current Condition Before planning your basement transformation, a thorough assessment of existing conditions is essential. Michigan basements present several common challenges worth specific attention: Moisture sources in Michigan basements typically include hydrostatic pressure from our high water tables, especially in spring months; condensation created when warm, humid air contacts cool basement surfaces; and water vapor migration through concrete foundations. Look for efflorescence (white powdery deposits on walls), visible water marks, peeling paint, or musty odors as indicators of moisture issues. Structural concerns common to Michigan foundations include settling from our significant freeze-thaw cycles, inward bowing of walls from expansive clay soils (particularly common in Southeast Michigan), and deteriorating mortar in older block foundations. Examine walls for horizontal or stair-step cracks, measure floors for level, and note any gaps between walls and floors or ceilings. Mold assessment is particularly important in Michigan basements due to our humid climate. Black or green spots on walls, ceilings, or stored items indicate active mold growth. Remember that visible mold often suggests more extensive growth behind surfaces. Professional testing may be warranted if family members have respiratory sensitivities or if extensive mold is visible. Humidity testing provides valuable baseline data. Michigan basements typically run humid (often 60-80% relative humidity) without intervention. Use a hygrometer to measure levels in various basement areas and note how readings change during different weather conditions. Ideal basement humidity should be 30-50% for comfort and mold prevention. Document your findings with photos, measurements, and notes to create a comprehensive baseline assessment. This documentation will help prioritize issues and serve as a valuable reference point when consulting with contractors about your Michigan basement remodeling project. Ready to explore how these favorable conditions could benefit your basement project? Click Here Step 1: Addressing Michigan’s Moisture Challenges First Water management represents the most crucial foundation for successful basement remodeling in Michigan. Our state’s combination of precipitation patterns, soil types, and temperature fluctuations creates persistent moisture challenges that must be resolved before any finishing work begins. Common water intrusion points in Michigan basements include: Cove joints (where walls meet floors) Cracks in foundation walls or floors Window wells and basement windows Penetrations for utilities Sump basins and drain tiles Capillary action through concrete Effective waterproofing approaches depend on your specific issues and budget. Interior waterproofing systems typically include installing drainage channels along foundation perimeters to direct water to a sump pump system. These solutions work well for most Michigan homes and can be installed regardless of weather or season. Exterior waterproofing provides more comprehensive protection but requires excavation around foundations, making it more expensive and weather-dependent. Many Michigan homes benefit from combining both approaches. Sump pump selection deserves careful consideration in Michigan’s climate. We recommend: Cast iron pumps rather than plastic for durability and quieter operation Battery backup systems to maintain protection during power outages (common during Michigan storms) Water-powered backup options for extended outage protection Alarms and monitoring systems for peace of mind Drainage solutions should be engineered specifically for your soil type. Southeast Michigan’s clay soils may require more robust drainage approaches than the sandier soils of Western Michigan. Proper slope grading away from foundations (minimum 6 inches drop over 10 feet) and extended downspouts are essential supplementary measures regardless of your location. Dehumidification represents the final component of comprehensive moisture management. For Michigan basements under 2,000 square feet, a high-quality stand-alone dehumidifier rated for basement use is often sufficient. Larger spaces or particularly challenging environments may benefit from whole-house dehumidification systems integrated with HVAC. Either system should maintain relative humidity below 50% year-round. Proper moisture management typically represents 15-30% of a total basement remodeling budget in Michigan but provides the essential foundation for all subsequent work. Most comprehensive waterproofing solutions can be completed within 3-7 days, though more complex issues may require additional time. Get Your Free Michigan Basement Moisture Assessment Today! Before proceeding with your basement remodeling project, ensure your moisture issues are completely resolved. Contact Michrose Construction for a thorough moisture assessment and customized waterproofing plan designed specifically for your Michigan home’s unique conditions. Click Here Step 2: Foundation Repairs and Structural Improvements Michigan’s climate creates specific structural challenges for basements that must be addressed before finishing work begins. Our freeze-thaw cycles, expansive clay soils in many regions, and high water tables contribute to foundation issues that require specialized solutions. Common Michigan foundation problems include: Wall bowing from lateral soil pressure (particularly in clay-heavy regions like Ann Arbor, Detroit suburbs, and Lansing areas) Settlement cracks from soil consolidation or erosion Floor slab cracks and heaving from moisture or frost Deteriorating block mortar in older foundations Support post issues including settling or
Why Now is the Perfect Time for Your Michigan Basement Remodel?
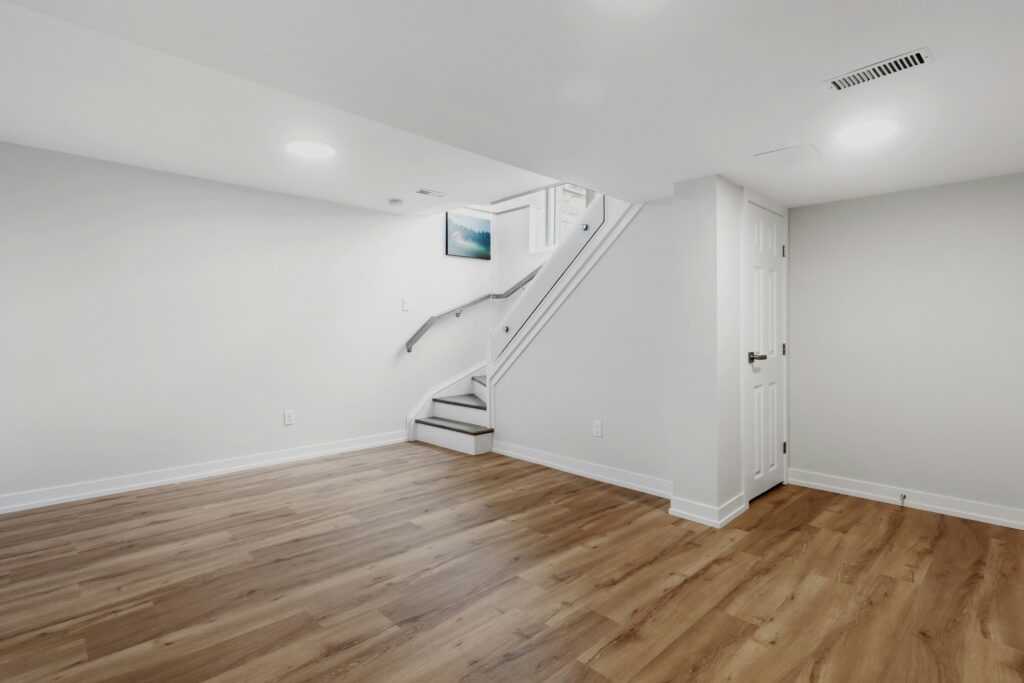
Why Now Is the Perfect Time for Your Michigan Basement Remodel? In Michigan’s ever-evolving home improvement landscape, basement remodeling has emerged as one of the smartest investments homeowners can make. Recent trends show that underground space renovations have steadily increased across Michigan in recent years, with homeowners recognizing both the immediate lifestyle benefits and long-term value these projects deliver. At Michrose Construction, we’ve witnessed firsthand how a thoughtfully designed lower level transformation can revolutionize a home’s functionality and worth. What makes the current climate particularly favorable for upgrading your basement? A unique convergence of market conditions, material availability, and seasonal timing has created an optimal window of opportunity for Michigan homeowners. Current Market Conditions Favoring Home Improvements After years of volatility, the home improvement sector has entered a welcome period of stabilization. Material prices that once fluctuated wildly have settled into more predictable patterns, making budget planning considerably more reliable. For Michigan homeowners, this newfound predictability translates to fewer mid-project surprises and more accurate initial estimates. The availability of skilled contractors has also improved significantly in Michigan’s construction market. While the post-pandemic shortage of qualified professionals created lengthy delays, MichRose Construction has maintained a full team of experienced basement specialists ready to take on new projects without the extended waiting periods seen in previous years. Michigan homeowners are also benefiting from favorable home equity positions. With property values remaining strong across Ann Arbor and surrounding communities, many homeowners have accumulated substantial equity, making this an ideal time to reinvest in your property through strategic improvements like basement remodeling. Current financing options further sweeten the opportunity. While interest rates have adjusted from their historic lows, they remain relatively favorable compared to historical averages, especially for home equity loans and lines of credit often used for significant renovations. Ready to explore how these favorable conditions could benefit your basement project? Click Here Michigan’s Housing Market Context Michigan’s persistent housing inventory shortage has dramatically altered the improvement-versus-moving equation. With limited housing stock available in desirable areas like Ann Arbor, many homeowners are choosing to optimize their current space rather than compete in a challenging buyers’ market. Let’s consider the numbers: The average cost of moving to a larger home in the Ann Arbor area now exceeds $35,000 when accounting for realtor fees, closing costs, moving expenses, and the price premium on larger properties. In contrast, a comprehensive lower level renovation typically ranges from $25,000 to $50,000 depending on scope, delivering additional living space without the disruption and expense of relocating. The return on investment for below-grade renovations in Michigan remains impressive. Recent real estate analyses indicate that well-executed basement projects return approximately 70-75% of their cost at resale in the Michigan market, with higher returns in premium markets like Ann Arbor. Beyond immediate returns, finished basements significantly enhance marketability. Homes with professionally converted lower levels in Michigan neighborhoods typically sell 25% faster than comparable properties with unfinished spaces. This improved marketability provides valuable flexibility for homeowners in uncertain economic times. Seasonal Advantages for Starting Now Timing underground renovation projects with Michigan’s climate cycle requires strategic planning. Spring and early summer offer ideal conditions for basement improvements, particularly if your project involves any exterior access modifications or utility work. The ground has thawed, yet summer’s heavy rains haven’t arrived – creating perfect conditions for any necessary exterior excavation. Contractor availability also tends to be more favorable during this season. While summer months traditionally see peak demand for exterior projects, starting your lower level planning now puts you ahead of the rush. MichRose Construction can typically begin basement projects more quickly in the current season than during the mid-summer construction boom. Project completion timing is another consideration. Starting your renovation now means you’ll likely enjoy your new space before fall and winter, when Michigan families naturally spend more time indoors. Imagine having your new home theater, game room, or guest suite ready just as the weather encourages more indoor activities. Economic Incentives Currently Available Several financial incentives make the current market particularly advantageous for basement improvements. While standard home improvements don’t typically qualify for direct tax deductions, energy efficiency upgrades often incorporated in basement remodels may qualify for various incentives. Michigan’s energy companies offer substantial rebates for efficiency improvements. For example, DTE Energy and Consumers Energy both provide rebates for insulation upgrades, high-efficiency heating systems, and ENERGY STAR appliances – all commonly incorporated into comprehensive basement renovations. Local Michigan incentives add another layer of potential savings. Several communities around Ann Arbor offer property tax freezes for significant home improvements, meaning your property taxes won’t immediately increase despite the added value of your renovation. To maximize these benefits, timing is crucial. Many energy efficiency programs operate with annual budgets that can be depleted before year-end. Starting your project now ensures you can take full advantage of current incentives before they’re reduced or eliminated. Addressing Material and Supply Chain Considerations After years of disruption, the supply chain for construction materials has largely normalized, creating a window of opportunity for Michigan homeowners. Lumber prices, which saw historic volatility, have settled into more predictable patterns. Similarly, drywall, flooring, and finishing materials are readily available without the extended lead times experienced in recent years. Michigan-specific supply networks have shown particular improvement. Local suppliers have adapted their inventory management and expanded warehousing capacity, reducing delays that previously plagued home improvement projects. At MichRose Construction, we’ve developed strategic relationships with key Michigan suppliers, allowing us to secure quality materials at competitive prices. Our purchasing power and established vendor relationships translate to cost savings and reliability for our clients’ basement projects. Industry analysts suggest this period of stability may be temporary. Several factors, including potential tariff changes, transportation costs, and manufacturing capacity, could lead to future price increases. Acting now allows you to lock in current favorable pricing before potential market shifts. Technology and Innovation Now Available The technology available for basement remodeling has advanced significantly, offering Michigan homeowners unprecedented options for creating comfortable, durable basement spaces. Waterproofing solutions have seen revolutionary
6 Best Stamped Concrete Patterns That Withstand Michigan Weather
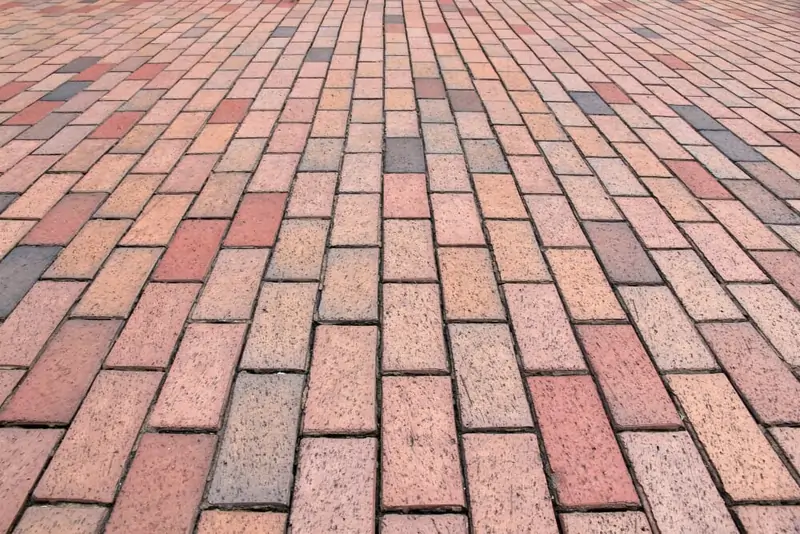
6 Best Stamped Concrete Patterns That Withstand Michigan Weather If you’re a Michigan homeowner, you know our weather can be brutal on outdoor surfaces. From freezing winters to sweltering summers, our driveways, patios, and walkways take a beating year-round. That’s why stamped concrete has become such a popular choice for outdoor spaces across the state. It combines the durability of concrete with the beauty of more expensive materials—without their maintenance headaches. Let’s explore six stamped concrete patterns that really hold up to Michigan’s challenging climate, along with tips to keep your concrete looking great for years to come. Why So Many Michigan Homeowners Choose Stamped Concrete? Before diving into specific patterns, it helps to understand why stamped concrete makes so much sense in our state. Unlike pavers that shift during frost heaves or wood that warps with moisture, properly installed stamped concrete creates a solid surface that stands up to our seasonal extremes. The secret lies in combining a strong concrete base with protective sealers and designs that actually work with our climate rather than against it. Plus, you get the look of premium materials like stone or brick without their high price tags and maintenance requirements. Ready to Finish Your Basement? Get Your Free Expert Quote Click Here The 6 Most Weather-Resistant Stamped Concrete Patterns for Michigan 1. Ashlar Slate Stamped Concrete You’ve probably seen this popular pattern around Michigan neighborhoods. It mimics the sophisticated look of natural slate but performs much better in our weather. What makes ashlar slate so perfect for Michigan? For starters, its textured surface gives you better footing during our icy winters and rainy springs. The varied pattern also helps hide any minor imperfections that might develop after years of freeze-thaw cycles. Most importantly, when properly sealed, this pattern resists the moisture penetration that leads to winter damage. Many of our clients love how ashlar slate complements both traditional and contemporary homes while providing practical benefits during our harsh winters. 2. Wood Plank Stamped Concrete Love the warm look of a wooden deck but hate the maintenance? Wood plank stamped concrete gives you the best of both worlds. Think about what happens to real wood in Michigan—it warps, cracks, and requires constant refinishing. Wood-patterned concrete eliminates these headaches while still giving you that natural, inviting appearance. You won’t need to worry about splinters, rotting boards, or annual staining. This pattern works beautifully for patios, pool surrounds, and outdoor living spaces. 3. Brick Pattern Stamped Concrete There’s something timeless about brick, but actual brick pavers can be problematic in our climate. Traditional brick walkways often shift during freeze-thaw cycles, creating uneven surfaces and tripping hazards. Brick-patterned stamped concrete solves this problem by giving you the classic brick appearance without the maintenance issues. You won’t have to deal with weeds growing between bricks or resetting pavers that heave during winter. We’ve installed this pattern for many driveways and walkways throughout Michigan, and homeowners appreciate how it maintains its clean, even surface year after year. 4. Flagstone Stamped Concrete Natural flagstone looks beautiful but comes with a hefty price tag and installation challenges. Stamped concrete that mimics flagstone delivers the same organic, natural look for a fraction of the cost and maintenance. The textured finish provides reliable traction during Michigan’s snowy and rainy seasons. Unlike real flagstone that can shift with ground movement from frost heaves, stamped concrete creates a unified surface that stays intact through seasonal changes. This pattern is particularly popular for garden paths and patios where you want to blend with Michigan’s natural landscapes while having something that stands up to our weather extremes. 5. Cobblestone Stamped Concrete There’s something charming about cobblestone that adds character to any property. However, authentic cobblestones create notoriously uneven surfaces—a real problem during Michigan winters when you’re trying to shovel snow. Stamped cobblestone concrete gives you that old-world charm without the practical drawbacks. You get a smoother surface that’s easier to maintain while still enjoying the distinctive look that makes your property stand out. This pattern works beautifully for driveways and decorative borders, bringing a touch of European elegance that withstands Michigan’s harsh conditions. 6. Seamless Textured Stamped Concrete If you prefer a more subtle, contemporary look, seamless textured concrete might be your perfect match. Rather than imitating a specific material, this style creates a continuous textured surface with a clean, modern appearance. The lack of defined grout lines actually helps this style perform better in Michigan winters. There are fewer places for water to penetrate, reducing the chance of freeze-thaw damage. It’s also incredibly easy to maintain and works well with modern architecture. Many of our clients in newer neighborhoods choose this option for its understated elegance and practical benefits in our climate. Getting Professional Installation That Lasts Through Michigan Winters The success of stamped concrete in Michigan depends heavily on proper installation. Here’s what makes the difference between a surface that lasts decades versus one that deteriorates after a few seasons: Proper base preparation: Michigan’s soil conditions require adequate compaction and drainage to prevent shifting and cracking. Winter-ready concrete mix: Experienced contractors use mixes specifically designed to withstand our freeze-thaw cycles. Strategic expansion joints: These accommodate the extreme temperature fluctuations we experience. Timing matters: Professional installers understand the best seasons for installation in Michigan’s variable climate. When choosing a contractor, make sure they have specific experience with Michigan installations and understand our unique climate challenges. Also Planning a bathroom remodel? Start with a solid foundation inspection Don’t let limited space limit your dreams. At Michigan Rose Construction, we specialize in turning compact bathrooms into stunning, functional retreats that feel twice their size. Our expert team knows every inch counts, and we’re masters at maximizing small spaces with smart design solutions that work perfectly for Michigan homes. Request free consultationLearn More About Bathroom Remodel for Limited Space Protecting Your Stamped Concrete Through Michigan’s Seasons Each season in Michigan brings different challenges for concrete surfaces. Here’s how to keep your stamped concrete looking great year-round: Winter
Why Finish Your Basement? 10 Benefits for Michigan Homeowners
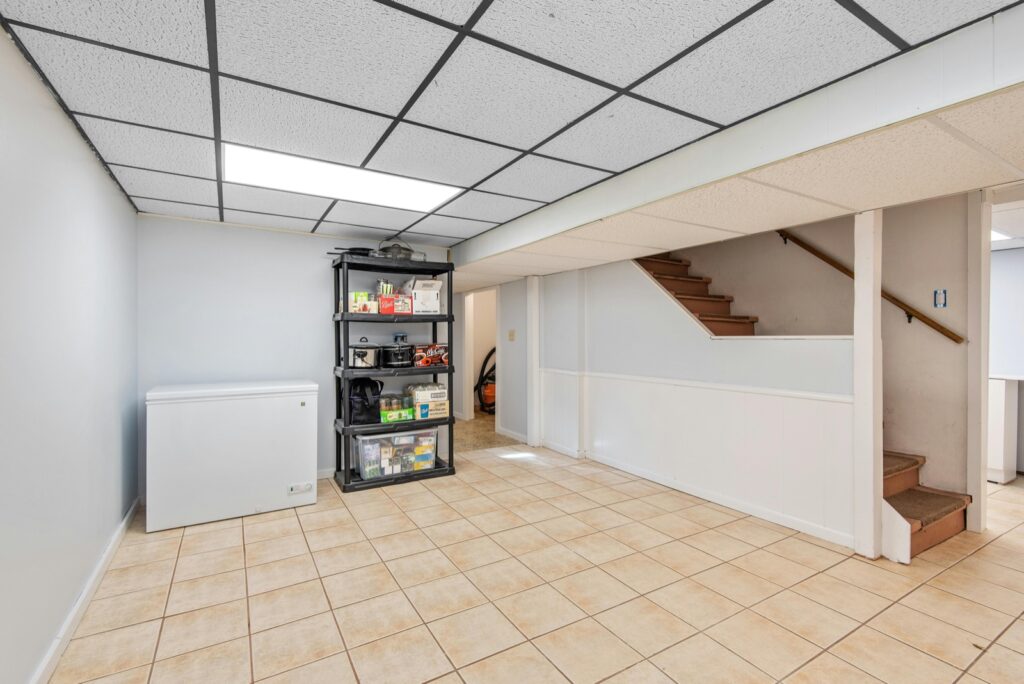
10 Reasons Why You Should Finish Your Basement in Michigan A basement remodeling project is one of the smartest investments for Michigan homeowners. Whether you’re aiming to increase property value, expand living space, or improve energy efficiency, a professionally finished basement delivers substantial returns. Here are ten compelling reasons why basement remodeling should be your next home improvement project in Michigan. 1. Increase Your Home’s Value Professional basement remodeling can boost your home’s resale value by up to 70%. Michigan homebuyers consistently rank finished basements among their top desired features, making your property more marketable and commanding higher selling prices in today’s competitive market. 2. Extra Living Space Professional basement remodeling transforms underutilized square footage into valuable living areas. Whether creating a dedicated home office, welcoming family room, comfortable guest suite, or entertainment zone, finishing your basement maximizes your home’s potential without the expense of building additions. Ready to Finish Your Basement? Get Your Free Expert Quote Click Here 3. Energy Efficiency & Lower Utility Bills Unfinished basements significantly impact your home’s energy performance. Through professional basement remodeling with proper insulation, vapor barriers, and sealing techniques, homeowners typically see a 15-20% reduction in annual heating and cooling costs. This improvement makes your Michigan home more comfortable and energy-efficient year-round. 4. Protection from Michigan’s Harsh Weather Michigan’s challenging climate demands resilient home solutions. A professionally finished basement provides: A comfortable retreat during extreme weather Protection against severe storms Temperature-controlled living space Emergency shelter capabilities 5. Potential Rental Income With proper permits and compliance with local zoning laws, your basement remodeling project could create a valuable rental unit or Airbnb space. Michigan’s growing rental market offers excellent opportunities for generating additional monthly income through well-designed basement apartments. 6. Better Moisture and Mold Control Professional basement remodeling addresses common Michigan basement concerns through comprehensive moisture management systems. Expert waterproofing, proper ventilation, and humidity control protect your home’s structure and your family’s health by preventing mold and mildew issues. 7. Perfect for a Home Gym or Hobby Space Transform your basement through professional remodeling into a dedicated activity area. Whether creating a home gym, craft studio, music room, or workshop, your finished basement provides the perfect environment for pursuing hobbies while keeping your main living areas organized. 8. Entertainment & Recreation Hub Professional basement remodeling creates the ultimate entertainment space. From custom home theaters and game rooms to welcoming bars, your finished basement becomes the perfect gathering spot during Michigan’s long winters, enhancing your home’s social potential. 9. Added Storage Solutions Expert basement remodeling incorporates efficient storage solutions through: Custom built-in shelving systems Climate-controlled storage areas Organized closet designs Seasonal item storage spaces These improvements keep your entire home clutter-free while protecting valuable items. 10. Improved Home Safety & Security Professional basement remodeling enhances your home’s safety through: Code-compliant egress windows Modern fire safety systems Updated electrical infrastructure Emergency lighting installation These improvements protect your family while meeting Michigan building requirements. Also Planning a bathroom remodel? Start with a solid foundation inspection Don’t let limited space limit your dreams. At Michigan Rose Construction, we specialize in turning compact bathrooms into stunning, functional retreats that feel twice their size. Our expert team knows every inch counts, and we’re masters at maximizing small spaces with smart design solutions that work perfectly for Michigan homes. Request free consultationLearn More About Bathroom Remodel for Limited Space Basement Transformation by Michrose Construction: From Storage to Stunning Why Choose Michigan Rose Construction? With over 15 years+ of expertise in Michigan’s challenging climate, Michigan Rose Construction specializes in concrete foundation solutions. We understand local soil conditions, building codes, and freeze-thaw cycles. Our team delivers superior foundation work that withstands Michigan’s harshest weather, backed by comprehensive warranties and competitive pricing. From expert installations to reliable repairs, we’re committed to your home’s structural integrity. BEFORE: A typical Michigan basement: cluttered storage space with exposed utilities, concrete floors, and untapped potential. Like many homeowners, this space was relegated to storing holiday decorations and unused items, with temporary solutions for entertainment needs. AFTER: A professionally finished modern living space showcasing Michrose Construction’s expertise in basement remodeling: Premium Flooring: Luxurious water-resistant vinyl planks in a sophisticated weathered oak finish, perfect for Michigan’s climate Custom Built-ins: Expertly crafted storage solutions with clean lines and modern hardware Professional Lighting: Strategic recessed lighting that transforms the space, while maintaining an industrial-chic exposed ceiling in sleek black Smooth Walls: Perfectly finished drywall in a contemporary neutral tone Smart Space Planning: Organized layout with defined areas for multiple uses Quality Doors: Solid core doors with modern paneling for added sophistication Improved Ceiling Height: Maximized space while cleverly concealing necessary utilities From cluttered storage to sophisticated living space – see how Michrose Construction transformed this Michigan basement into a beautiful, functional area that adds real value to the home. Our Michigan-Focused Expertise 15+ years of specialized experience with Michigan homes and Businesses. Deep understanding of local building codes and climate requirements Award-winning design-build services Comprehensive project management Transparent pricing and detailed quotes Industry-leading warranty coverage Ready to Start Your Bathroom Transformation? Ready to Transform Your Kitchen as well? From stunning chef-inspired layouts to space-saving solutions, discover how to transform your Michigan kitchen into a beautiful, functional space that adapts to our state’s unique lifestyle. Our expert team specializes in both modern and traditional designs, perfect for any Michigan home. Request free consultationLearn About Kitchen Remodeling Final Thoughts: Investing in professional basement remodeling is crucial for maximizing your Michigan home’s living space and value. From entertainment areas to additional bedrooms, a properly finished basement protects your investment while creating functional spaces that withstand our state’s unique climate challenges, moisture concerns, and temperature fluctuations. Remember: Your basement isn’t just extra square footage—it’s a valuable living space that requires expert design and professional installation to perform effectively in Michigan’s demanding environment. Contact Michigan Rose Construction for a free consultation to discuss your basement remodeling vision. We’ll help you create and implement the perfect basement solution that ensures comfort, functionality, and lasting value for decades
Seasonal Foundation Care: Protecting Your Michigan Home’s Concrete Foundation
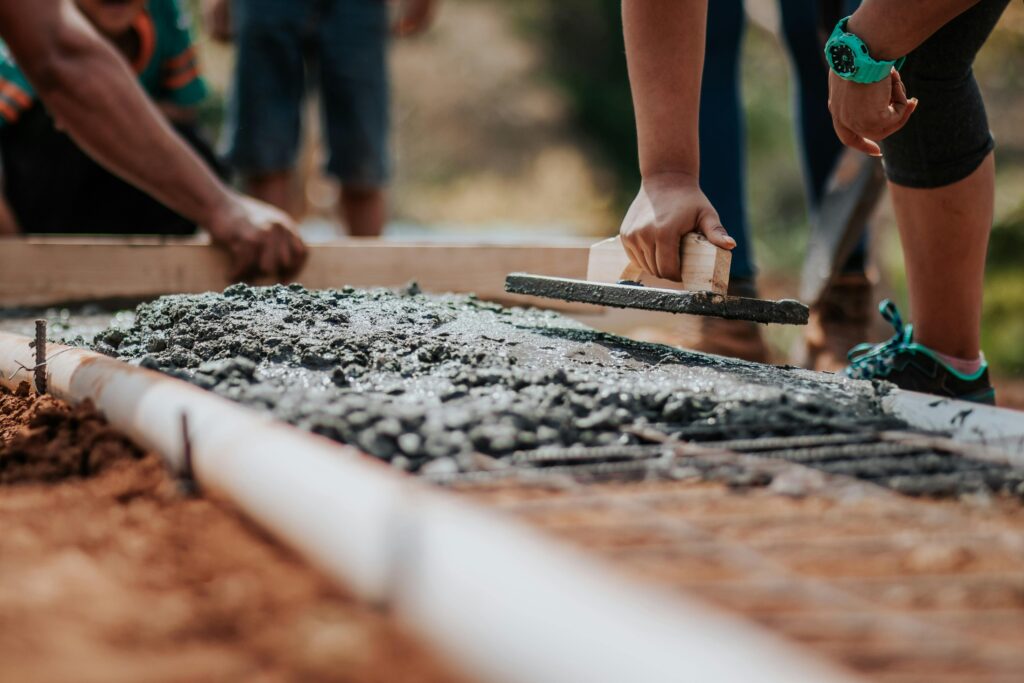
Understanding Michigan’s Seasonal Impact on Concrete Foundations Year-Round Weather Challenges Four Distinct Seasons: Michigan experiences dramatic seasonal changes that directly impact concrete foundations. Spring brings heavy rains and thaws, summer sees extreme heat, fall introduces temperature fluctuations, and winter brings severe freezing conditions – each season requiring specific concrete foundation maintenance approaches. Temperature Range Impact: Annual temperature variations from -20°F to 90°F cause concrete foundations to expand and contract significantly. This thermal movement can create stress points in your concrete foundation, potentially leading to cracks and structural issues if not properly monitored. Precipitation Management: The state’s average annual precipitation of 32 inches requires professional concrete foundation contractors to implement comprehensive drainage solutions. Improper water management can lead to hydrostatic pressure against foundation walls and potential damage to concrete slab foundations. Ground Movement Patterns: Seasonal soil changes affect concrete slab foundation stability differently throughout the year. Spring thaws can cause soil expansion, while summer drought might lead to soil shrinkage, both requiring professional concrete foundation repair attention. Extreme Weather Effects: Freeze: Thaw Impact: Michigan experiences over 100 freeze-thaw cycles annually, each cycle potentially affecting your concrete foundation’s integrity. These cycles can cause microscopic cracks to expand, requiring early intervention from concrete foundation contractors. Snow Accumulation Challenges: Heavy snowfall creates additional pressure against concrete foundation walls. As snow melts, it can saturate the soil around your foundation, necessitating proper drainage systems and professional monitoring. Spring Weather Patterns: Rapid temperature changes and increased rainfall test the effectiveness of foundation waterproofing and drainage systems. Professional concrete foundation repair may be needed to address winter damage during this crucial period. Summer Stress Factors: Intense heat can cause soil to dry and shrink, potentially leading to concrete foundation settlement. Professional monitoring helps identify early signs of stress requiring concrete foundation repair. Start Your Foundation Project Right – Free Expert Consultation Click Here Winter Foundation Protection (December – February) Freeze Protection: Insulation Requirements: Professional concrete foundation contractors recommend installing specific R-value insulation around exposed foundation areas. This protection helps maintain consistent concrete foundation temperatures and prevents freeze damage. Wall Monitoring Protocol: Regular inspection of concrete foundation walls for ice formation or frost accumulation. Early detection of ice buildup can prevent serious structural damage and expensive concrete foundation repair. Temperature Regulation: Maintain indoor temperatures above 55°F to prevent thermal stress on concrete foundations. Sudden temperature changes can cause concrete to expand or contract rapidly, leading to potential cracking. Professional Inspection Schedule: Schedule comprehensive concrete foundation inspections before severe winter weather arrives. This allows concrete foundation contractors to identify and address potential issues before they worsen. Snow Management: Snow Clearance Guidelines: Maintain a minimum 2-foot snow-free zone around all concrete foundation walls. This buffer helps prevent moisture accumulation and reduces pressure on foundation structures. Window Well Protection: Install proper window well covers and regularly clear snow accumulation to prevent water damage to concrete foundation walls during thaws. Ice Dam Prevention: Monitor roof and gutter conditions to prevent ice dam formation, which can cause water to back up and potentially damage concrete foundations. Thaw Pattern Monitoring: Document snowmelt patterns around your concrete slab foundation to identify potential drainage issues requiring professional attention. Moisture Control: Check basement humidity levels regularly Maintain proper ventilation despite closed windows Monitor for condensation on concrete foundation surfaces Address any water infiltration immediately Spring Foundation Care (March – May) Thaw Period Management: Inspect concrete foundation for winter damage Clear drainage systems of winter debris Check concrete slab foundation for frost heave effects Schedule professional concrete foundation repair if needed Water Management: Clean and repair gutters and downspouts Regrade soil around foundation if needed Test sump pump operation Clear window wells of debris Professional Assessment: Schedule comprehensive foundation inspection Document any new crack development Assess drainage system effectiveness Plan necessary concrete foundation repairs Summer Foundation Maintenance (June – August) Moisture Balance Maintain consistent soil moisture around foundation Water foundation perimeter during dry spells Monitor concrete slab foundation for settling Check basement humidity levels Preventive Measures: Trim vegetation near foundation walls Clean and maintain gutters regularly Monitor irrigation system placement Check for pest infestations Preventive Measures: Watch for new crack development Check doors and windows for proper operation Monitor basement wall alignment Document any changes in foundation condition Fall Preparation (September – November) System Checks: Clean and repair all drainage systems Inspect concrete foundation waterproofing Test basement heating systems Schedule preventive concrete foundation repair Exterior Preparation: Clear gutters of fall debris Adjust downspout extensions Grade soil away from foundation Remove dying vegetation near foundation Interior Measures: Check basement seals and weatherstripping Install window well covers Monitor basement temperature regulation Document pre-winter foundation condition Professional Maintenance Tips 1.) Regular Inspections Schedule quarterly professional assessments Document all foundation changes Monitor existing repairs Plan preventive maintenance 2.) Emergency Preparation Keep contractor contact information accessible Know warning signs of foundation issues Maintain emergency repair fund Document baseline foundation condition Prevention & Maintenance 1.) Seasonal Inspections Spring Assessment: Winter damage evaluation Summer Checks: Drainage system monitoring Fall Preparation: Winterizing procedures Winter Vigilance: Ice dam prevention 2.) Maintenance Protocols Regular Monitoring: Monthly visual inspections Documentation: Track changes and repairs Professional Reviews: Annual contractor assessments Preventive Actions: Address minor issues promptly Cost Analysis & ROI: Investment Understanding 1.) Early Intervention Costs Minor Repairs: $1,000-$5,000 Moderate Issues: $6,000- $10,000 Major Repairs: $10,000-$30,000 Full Replacement: $40,000+ 2.) Value Protection Property Worth: Maintains home value Insurance Impact: Affects coverage options Resale Benefits: Documented repairs increase trust Long-term Savings: Prevents escalating costs Note: All costs mentioned are based on average market rates and are provided for reference only. Actual prices may vary and are subject to change. Please contact us directly for a detailed quote tailored to your specific requirements Also Planning a bathroom remodel? Start with a solid foundation inspection Don’t let limited space limit your dreams. At Michigan Rose Construction, we specialize in turning compact bathrooms into stunning, functional retreats that feel twice their size. Our expert team knows every inch counts, and we’re masters at maximizing small spaces with smart design solutions that work perfectly
Why Concrete Foundation Repair in Michigan Shouldn’t Wait: Expert Solutions & Prevention Tips
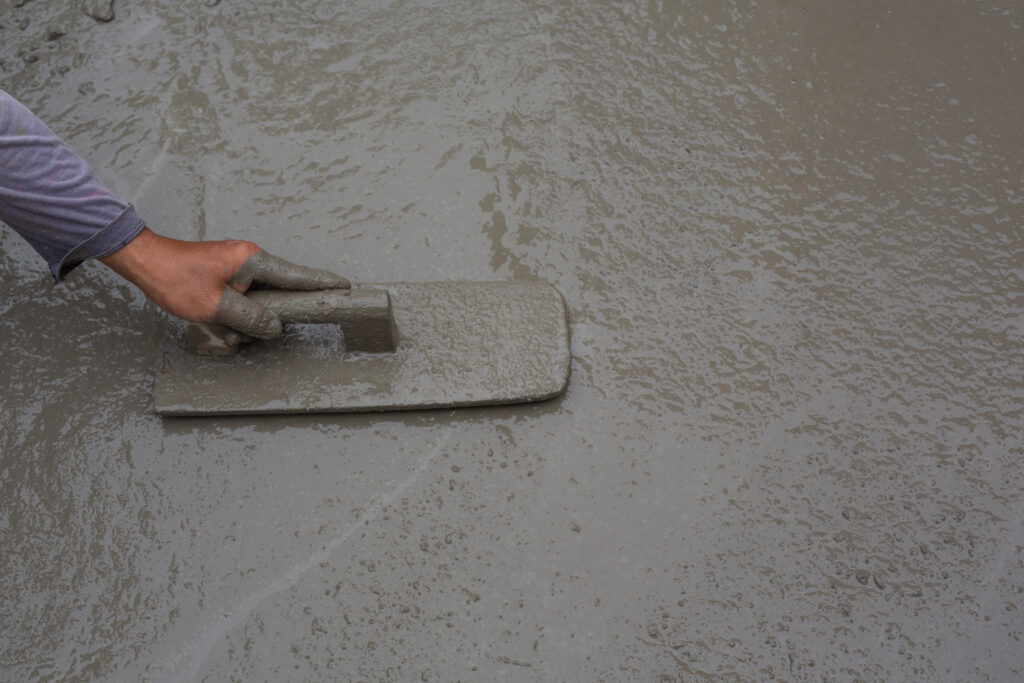
Why Concrete Foundation Repair in Michigan Shouldn’t Wait: Expert Solutions & Prevention Tips As experienced concrete foundation contractors in Michigan, Michigan Rose Construction understands that choosing the right concrete foundation is crucial for your home’s long-term stability. Whether you’re considering a concrete slab foundation or need concrete foundation repair, this comprehensive guide will help you make an informed decision for your Michigan Estate. Understanding the Urgency of Concrete Foundation Repair As experienced concrete foundation contractors in Michigan, we at Michigan Rose Construction have seen how delayed repairs can transform minor issues into major structural problems. Here’s why immediate action is crucial for your concrete foundation: Start Your Foundation Project Right – Free Expert Consultation Click Here The Cost of Waiting 1.) Progressive Damage Development Initial Stage: Small cracks in concrete foundation walls may appear harmless at first, often starting as thin lines barely visible to the untrained eye. These early warning signs are often overlooked by homeowners. Progression: Without proper concrete foundation repair, these cracks expand by 20-30% annually due to Michigan’s freeze-thaw cycles and soil movement. What starts as a small crack can become a significant structural issue within one season. Impact: As cracks widen, they compromise your concrete slab foundation’s structural integrity, allowing water infiltration and potentially affecting your home’s load-bearing capacity. Result: What might cost $2,500 to repair initially can escalate to $10,000 – $15,000 within months if left unaddressed, as damage compounds exponentially. 2.) Safety Considerations Structural Stability: Weakened concrete foundations gradually lose their ability to support your home’s weight, potentially leading to uneven settling and structural misalignment. Load-Bearing Capacity: As foundation damage progresses, your home’s ability to handle normal structural loads diminishes, potentially creating dangerous situations during extreme weather events. Family Safety: Compromised foundations can lead to various hazards, from tripping risks due to uneven floors to potential wall collapse in severe cases. Property Value: Homes with foundation issues typically see a 10-15% decrease in market value, with some buyers avoiding properties with foundation histories entirely. Michigan’s Unique Foundation Challenges: Climate Impact on Concrete Foundations 1.) Freeze-Thaw Cycles Annual Occurrence: Michigan experiences over 100 freeze-thaw cycles each year, significantly more than most other states, putting extraordinary stress on concrete foundations. Temperature Range: Daily temperature fluctuations from -10°F to 40°F cause soil expansion and contraction, directly impacting concrete foundation stability. Concrete Impact: Each cycle causes microscopic changes in concrete structure, gradually weakening it over time without proper maintenance and repair. Professional Solution: Our concrete foundation repair techniques account for these cycles, using flexible materials and advanced engineering methods. 2.) Moisture Challenges Annual Precipitation: Michigan averages 30-40 inches of rainfall yearly, creating constant moisture pressure on concrete foundations. Snowmelt Effects: Spring thaws release large volumes of water into the soil, potentially overwhelming standard drainage systems around concrete foundations. Water Table: Seasonal fluctuations in groundwater levels can cause hydrostatic pressure changes, affecting basement and concrete slab foundation stability. Prevention: Professional waterproofing systems must be designed specifically for Michigan’s unique moisture patterns. 3.) Soil Conditions Regional Variations: Michigan’s soil composition varies dramatically across regions, from heavy clay in Canton to sandy loam in Chelsea, each requiring specific concrete foundation repair approaches. Clay Content: Southeast Michigan’s high clay content soil expands up to 15% with moisture absorption, creating significant pressure against concrete foundations. Sandy Soils: Southeast Michigan’s sandy soils can wash away under foundations during heavy rains, potentially creating voids beneath concrete slab foundations. Expert Knowledge: Local concrete foundation contractors must understand these soil variations to implement effective, long-lasting repairs. Warning Signs That Demand Action Critical Indicators 1.) Concrete Foundation Cracks Hairline Cracks: Cracks under 1 inch wide should be professionally monitored quarterly, as they can indicate early stages of foundation stress or normal settling. Moderate Cracks: Cracks reaching 1/8 inch require immediate professional assessment, as they often signal active foundation movement or structural stress. Severe Cracks: Cracks exceeding 1/2 inch demand emergency concrete foundation repair, as they typically indicate significant structural compromise. Pattern Analysis: Vertical cracks often indicate settling, while horizontal cracks may signal dangerous lateral pressure against foundation walls. 2.) Water Damage Signs Surface Indicators: White, chalky mineral deposits (efflorescence) on concrete surfaces indicate water penetration through foundation materials. Moisture Presence: Damp spots on concrete slab foundations or basement walls suggest active water infiltration requiring professional attention. Mold Growth: Black or dark green spots near foundation walls indicate chronic moisture issues that can compromise both structural integrity and family health. Basement Conditions: Persistent musty odors signal ongoing moisture problems that require professional concrete foundation repair intervention. 3.) Structural Changes Floor Levels: Uneven surfaces indicate foundation settling Door Function: Sticking doors signal frame shifts Wall Integrity: Gaps between walls and ceilings Progressive Nature: Issues worsen without intervention Professional Repair Solutions Expert Concrete Foundation Repair Methods 1.) Crack Treatment Modern Materials: High-grade epoxy solutions Application Method: Pressure injection system Durability: Permanent bonding with existing concrete Warranty: Guaranteed professional results 2.) Structural Reinforcement Support Systems: Steel pier installation Wall Stability: Carbon fiber strapping Level Correction: Hydraulic lifting for concrete slab foundations Quality Assurance: Professional concrete foundation contractors’ expertise. Prevention & Maintenance 1.) Seasonal Inspections Spring Assessment: Winter damage evaluation Summer Checks: Drainage system monitoring Fall Preparation: Winterizing procedures Winter Vigilance: Ice dam prevention 2.) Maintenance Protocols Regular Monitoring: Monthly visual inspections Documentation: Track changes and repairs Professional Reviews: Annual contractor assessments Preventive Actions: Address minor issues promptly Cost Analysis & ROI: Investment Understanding 1.) Early Intervention Costs Minor Repairs: $1,000-$5,000 Moderate Issues: $6,000- $10,000 Major Repairs: $10,000-$30,000 Full Replacement: $40,000+ 2.) Value Protection Property Worth: Maintains home value Insurance Impact: Affects coverage options Resale Benefits: Documented repairs increase trust Long-term Savings: Prevents escalating costs Note: All costs mentioned are based on average market rates and are provided for reference only. Actual prices may vary and are subject to change. Please contact us directly for a detailed quote tailored to your specific requirements Also Planning a bathroom remodel? Start with a solid foundation inspection Don’t let limited space limit your dreams. At Michigan Rose Construction, we specialize in turning compact bathrooms
